
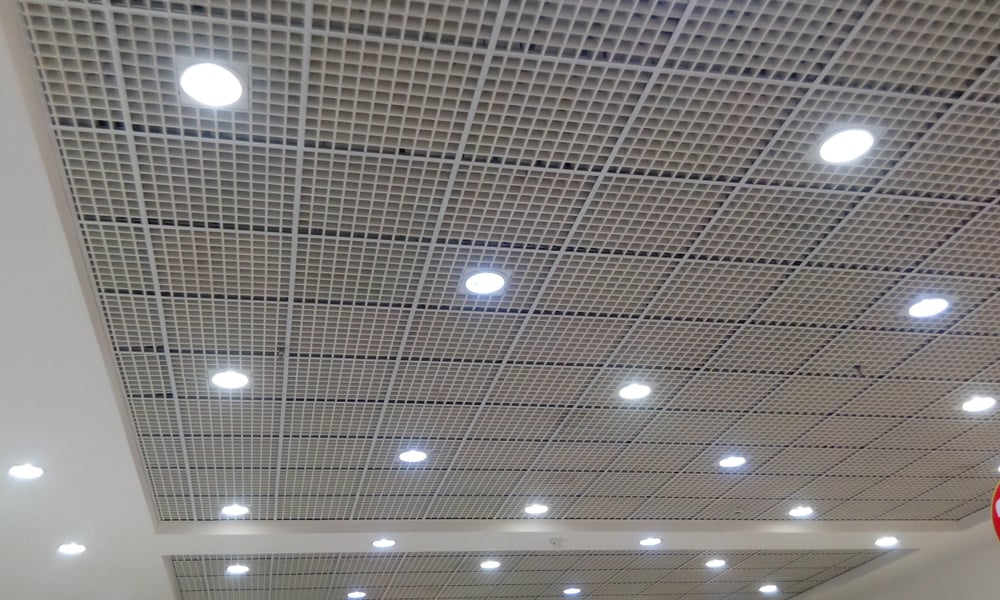
Ceiling systems do more than cover what’s above a room. They affect how a space looks, how sound carries, and how easy it is to access lighting and utilities. That is why choosing the right drop ceiling grid dimensions matters from the start. A grid that fits the space properly creates cleaner lines, supports fixtures correctly, and avoids costly adjustments later.
Industry data shows the global ceiling tiles market is valued at over $7 billion, driven by ongoing commercial construction and renovation projects. That steady demand reflects how common suspended ceilings have become in offices, schools, healthcare facilities, and retail spaces. As more buildings rely on drop ceilings, understanding grid sizing has become a practical planning step rather than a design afterthought.
The right grid dimensions depend on room size, ceiling height, tile selection, and how the space will be used. This page breaks down standard drop ceiling grid sizes, how to measure your space, and how to choose a layout that works for both performance and appearance.
Key Takeaways
- Standard grid sizes simplify installation and reduce material waste
- Accurate measurements lead to cleaner edges and better alignment
- Different room types benefit from different grid layouts
- Lighting and HVAC fixtures must match the grid dimensions
- Early planning minimizes costly layout changes
What Is a Drop Ceiling Grid?
A drop ceiling grid is a suspended metal framework installed below the structural ceiling. It supports ceiling tiles while also providing openings for lighting fixtures, air vents, speakers, and access panels. The grid creates a modular ceiling system that allows individual tiles to be removed for inspections, repairs, or upgrades.
Grid dimensions matter because they determine how evenly tiles are distributed across a space. A poorly planned grid can result in narrow border tiles, off-center fixtures, or uneven lines that draw attention to the ceiling for the wrong reasons. Proper sizing creates balance, improves access to building systems, and supports a clean, professional appearance.
Correct grid dimensions also play a structural role. Proper sizing helps distribute weight evenly across the suspension system, reducing stress on hangers, main runners, and cross tees. In commercial environments, accurate grid layouts support code compliance, consistent fixture spacing, and long-term system durability.
Because ceiling grids interact directly with lighting, HVAC, and fire protection systems, dimensions should be planned early in the project. This coordination minimizes field adjustments, speeds installation, and reduces material waste.
Standard Drop Ceiling Grid Dimensions
Most suspended ceilings rely on standardized grid sizes designed to work with commonly available tiles and fixtures. These sizes streamline ordering, installation, and long-term maintenance across commercial and residential spaces. Standard dimensions also make it easier to coordinate lighting, HVAC components, and access panels without custom fabrication.
Using common grid sizes reduces material waste, limits on-site cutting, and simplifies future repairs or replacements. When tiles or fixtures need to be swapped out, standardized grids allow building owners to source compatible products quickly and cost-effectively.
The most widely used drop ceiling grid dimensions include:
2′ × 2′ Grid
A 2′ × 2′ grid supports square ceiling tiles and is often selected for spaces that require tighter layouts or enhanced acoustic control. The smaller tile format allows more flexibility when placing lights, speakers, and vents.
This grid size is commonly used in classrooms, retail environments, and areas where sound absorption is a priority. It can also be helpful in spaces with lower ceilings, as the smaller panels create a more proportioned visual effect.
2′ × 4′ Grid
The 2′ × 4′ grid is the most widely used ceiling grid in commercial construction. It supports rectangular tiles and standard lighting troffers, making it a practical choice for offices and large open spaces.
Because this grid size is so common, replacement tiles and fixtures are readily available. Installation is typically faster, and future modifications are easier to manage. For many projects, this grid offers the best balance of efficiency and flexibility.
Custom or Non-Standard Grids
Custom grid layouts are used when standard sizes do not meet design or functional requirements. These may include specialty architectural designs, curved ceilings, or spaces with unique dimensions.
While custom grids can enhance visual impact, they require careful coordination between designers, contractors, and suppliers. Lead times, costs, and installation complexity are usually higher than with standard grid systems.
Standard Tile Sizes That Match the Grid
Tile size and grid size must work together for a ceiling system to function properly. Selecting compatible components ensures a secure fit and consistent appearance across the entire space. Before choosing a tile size, it is important to consider how lighting, ceiling height, and room proportions will affect the finished result. Smaller tiles allow more flexibility for fixture placement, while larger tiles reduce the number of seams and speed up installation. Ceiling height also plays a role, as certain tile formats can make a space feel more open or more compact.
| Tile Size | Typical Grid | Common Use |
| 2′ × 2′ | 2′ × 2′ grid | Retail spaces, schools, and acoustic control |
| 2′ × 4′ | 2′ × 4′ grid | Offices, warehouses, general use |
| Specialty sizes | Custom grid | Design-driven or architectural applications |
How to Measure Your Space for Ceiling Grid
Accurate measurements are essential before selecting grid dimensions or ordering materials. Even small errors can affect the entire ceiling layout.
Begin by measuring the length and width of the room. Record dimensions carefully and account for any irregularities in wall alignment. Structural columns, soffits, and bulkheads should be noted, as they can impact grid spacing.
Next, measure the ceiling height and determine how much clearance is needed above the grid. Lighting fixtures, ductwork, and fire suppression systems all require adequate space above the ceiling plane.
It is also important to identify the locations of lights, vents, speakers, and access points. Planning the grid around these elements helps maintain symmetry and reduces the need for adjustments during installation.
Before finalizing material orders, review all measurements and layout plans. Double-checking dimensions at this stage can prevent delays, waste, and unexpected costs.
Choosing Grid Dimensions Based on Room Type
Different environments place different demands on ceiling systems. Grid dimensions should align with how the space will be used, how often access above the ceiling is required, and how fixtures are distributed. The wrong grid size can complicate lighting layouts, limit access to utilities, or disrupt the visual balance of the room.
Room size, ceiling height, and traffic patterns all influence grid selection. Larger spaces often benefit from standardized grids that support quick installation and easy replacement, while smaller or specialized rooms may require tighter layouts for better proportion and control.
Selecting grid dimensions based on room function helps ensure the ceiling supports daily use, maintenance needs, and long-term flexibility without unnecessary modifications.
Residential Spaces
In residential settings such as basements or finished lower levels, drop ceilings provide convenient access to plumbing and electrical systems. Homeowners often prefer cleaner visual lines, which may lead to choosing hidden grid systems or layouts that integrate lighting seamlessly.
Ceiling height is a key consideration in homes. Smaller tiles or carefully planned grids can help maintain a comfortable sense of scale in lower-ceiling spaces.
Commercial and Office Spaces
Commercial offices typically favor standardized grid sizes for efficiency and consistency. The 2′ × 4′ grid is widely used because it aligns with common lighting and HVAC components.
Standardization also simplifies maintenance. Damaged tiles can be replaced easily, and future renovations are less disruptive when grid layouts are consistent throughout the building.
Retail and Public Areas
Retail and public spaces often use ceiling systems as part of the overall design strategy. Flexible grid layouts allow for accent lighting, signage integration, and decorative features.
In areas with higher ceilings, larger grids or specialty tiles may be used to enhance openness. Grid selection should balance aesthetics with practical access to utilities.
Matching Ceiling Grid to Fixtures
Ceiling fixtures must be compatible with the selected grid dimensions. Lighting, HVAC, and safety systems all depend on proper alignment.
Standard lighting troffers are designed to fit 2′ × 4′ grids, making them easy to install and replace. Using the correct grid size ensures fixtures sit flush and distribute light evenly.
Speakers, smoke detectors, and sprinkler heads should be positioned within grid openings whenever possible. Proper planning reduces the need to cut tiles or modify the grid during installation.
HVAC diffusers and vents also influence grid spacing. Coordinating ceiling and mechanical layouts helps maintain consistent airflow and clean ceiling lines.
Common Mistakes to Avoid
Even well-planned ceiling projects can run into problems if key details are overlooked. Many issues stem from decisions made early in the layout phase, before materials are ordered or installation begins. Identifying these risks in advance helps prevent delays, added costs, and visual inconsistencies.
Common mistakes include:
- Failing to plan the lighting layout early: This often leads to misaligned fixtures or the need to rework the grid. Lighting specifications should be confirmed before finalizing grid dimensions.
- Buying tiles that do not match the grid size: Incompatible tiles result in wasted materials and installation delays. Grid and tile sizes must align exactly.
- Ignoring door and window heights: Overlooking these elements can create narrow border tiles or awkward transitions at visible edges. Grid layouts should account for sightlines and finished openings.
- Measurement errors: Even small inaccuracies can cause uneven grid spacing and poor visual results. Precise measurements are essential during planning.
Avoiding these issues improves installation efficiency and ensures the ceiling system performs as intended. Careful coordination between layout, fixtures, and measurements leads to a cleaner finish and fewer adjustments during installation.
Choosing the Right Drop Ceiling Grid for Your Project
Choosing the right ceiling grid dimensions is a planning decision that affects both performance and appearance. The grid must support lighting, HVAC components, and access panels while creating clean lines and balanced borders. When dimensions are selected correctly, installation is smoother, maintenance is easier, and the finished ceiling looks intentional rather than improvised.
As a ceiling systems provider, Ceil Tex works with contractors, designers, and facility managers to evaluate space requirements and select grid dimensions that fit real installation conditions. Their team helps align grid layouts with tile sizes, fixture placement, and ceiling height constraints, reducing rework and material waste. The focus is on practical solutions that hold up over time, not just what looks good on paper.
If you are planning a new ceiling or upgrading an existing space, contact us for expert guidance. A professional review of your ceiling grid layout can help you choose the right dimensions, avoid common mistakes, and ensure your project is built for long-term performance.